Smart-AI
Installation Guide - Setup
- Last Update: 06-23-2024
- Created: 03-05-2023
- Version : 4.0
- Vite :
- Programing language : JavaScript
- React js: 18.2.0
- Express js: 4.19.2
- Node.js: v20.11.1
- Author by : mernsolution
Installation
- Download and install Node.js
- Open "Main/Smart-Ai" folder
- Open "Main\Smart-Ai\client" install all pakage [frontend]
cd C:\Main\Smart-Ai\client\npm install
cd C:\Main\Smart-Ai
npm installIt takes some time to finish
API connection
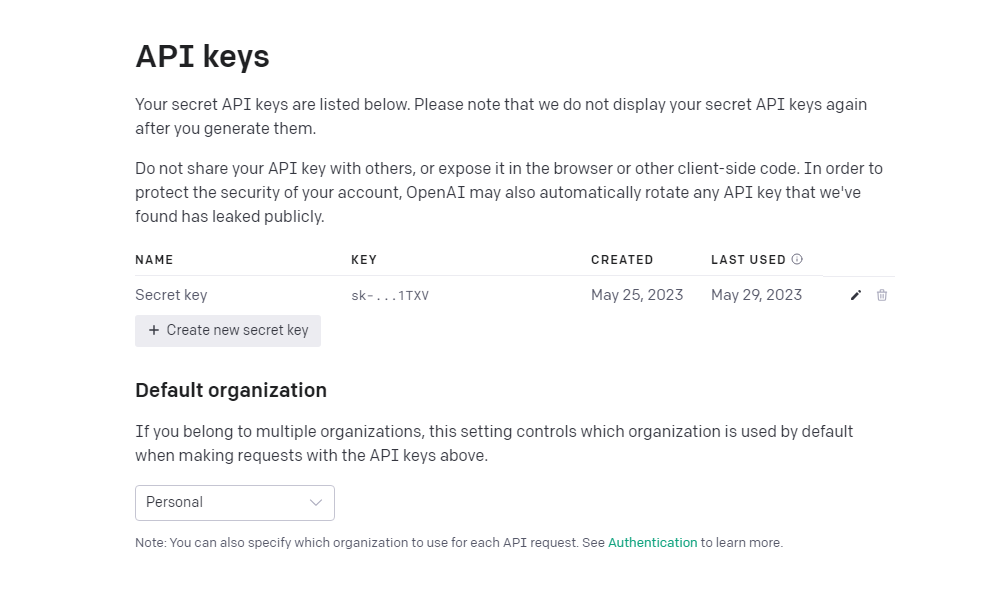
- Sign-up/Sign-in OPEN-AI
- Create your projectYour profile click and open Profile
- Open ("View API Keys") Create"API Key" "Copy This API key"
- Demo
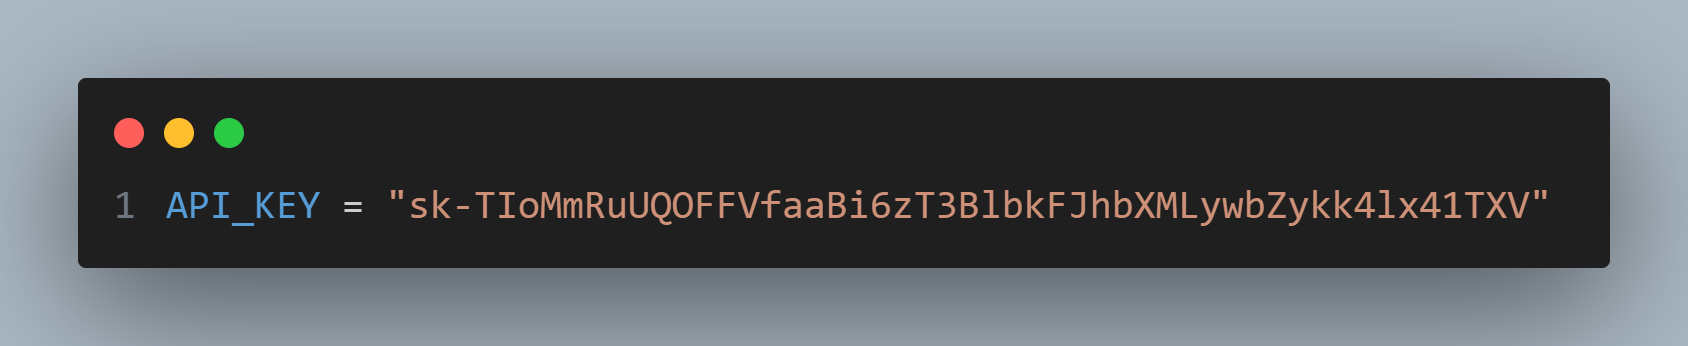
- Open .env file and add API key (" ")
Run in Local-host
- Open "Main\Smart-Ai\client" folder
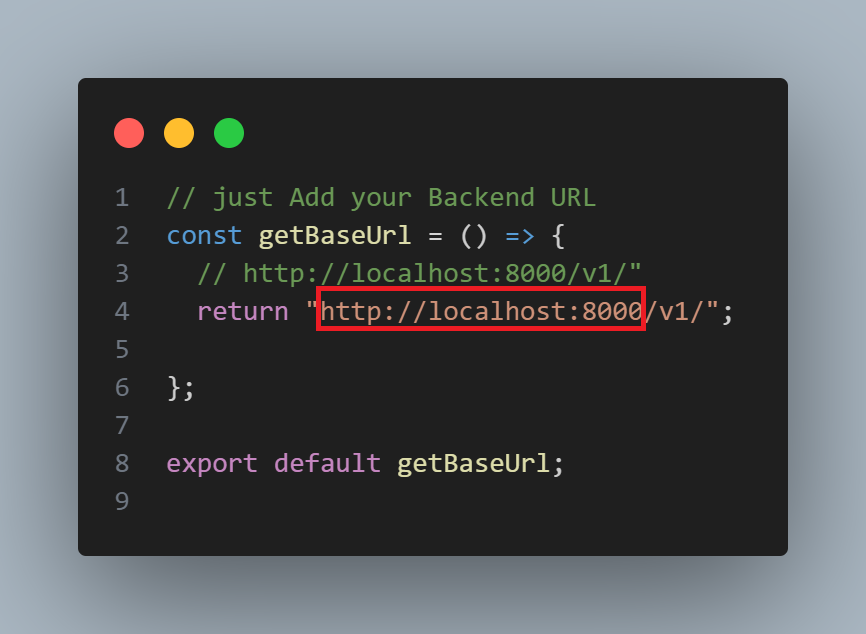
- Open "Main\Smart-Ai\client\src\helper\backendConnect.js" Add your backen URL
- Run this command to build react front-end.
- Open "Command Line/Terminal" and find folder "Smart-Ai" on your PC Like
- "Open \Main\Smart-Ai\server"
- "download node_module"
- Run this command to start the application.
- App should run on "http://localhost:5173/"
cd C:\Main\Smart-Ai\client
npm run build"It takes some time to finish & automatically" create a "dist folder"
Smart-Ai\client\ npm run dev
npm install
npm start
How this API works
Add Stripe and Paypal
Go to Admin Dashboard Update information
For support Multi language
- You can Read i18next documentation
- Packeg Use
- In public folder assets/localse then create Folder with language short form. Which language do you want to add (like English = en, Arabic = ar ...) "Folder name/translation.json" Add your text in json file
- IN json file Add your "variable Name"="Your text"
- Before Use this Variable you need import { useTranslation } from "react-i18next"
- Add in your component const { t } = useTranslation();
- Now you can use {t(Your variable name)}
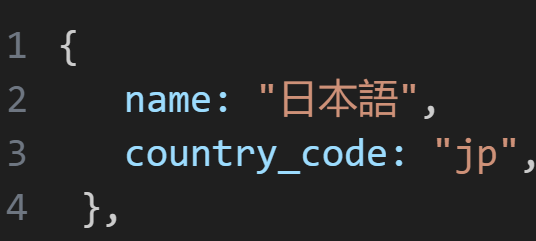
- open src/constants/Body_Language.jsx
- Add your language name,country_code in Body_Language.jsx

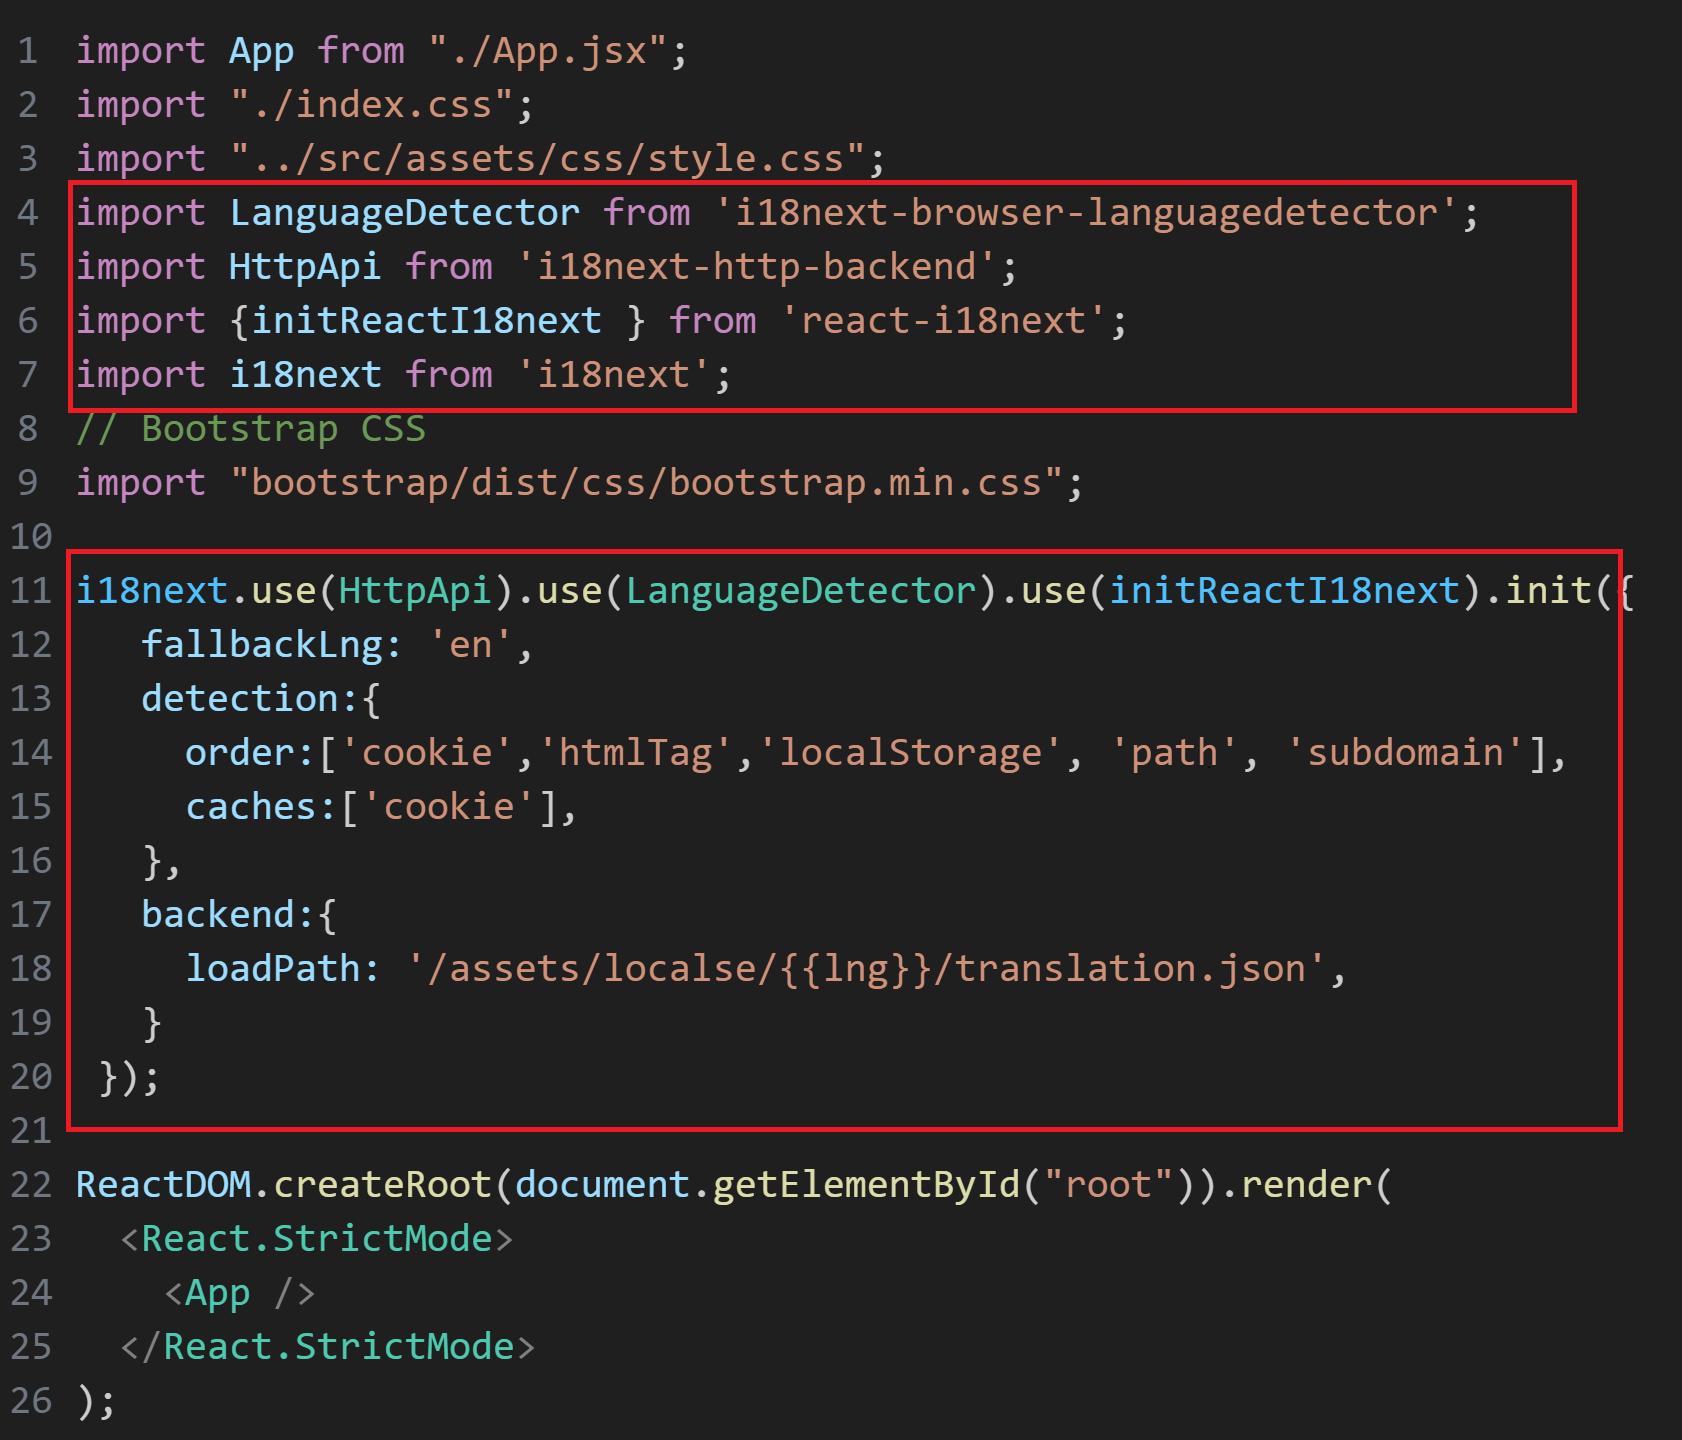
Set-Up enverment in client/src/Main.js
Add new language text in a component

How to add new language in home page dropdwon menu

Important parameters: training
Training: This parameter is responsible for defining the training of the intelligent AI employee. It is the text that the AI employee will use to introduce itself and identify itself as an expert in a certain subject.
training:"You will now play a character and respond as that character (You will never break character). Your name is Frankie Wilson. You are a business coach with extensive experience in starting, managing, and scaling businesses, which has given you a deep understanding of how they operate. You are known for your cheerful, wise, and effective communication skills, and always encourage your clients to conduct their own research. By drawing on your own history and experience, you can guide your clients towards the success they desire.",
API Model
We have listed the chat models for this project: gpt-3.5-turbo-0613

Output
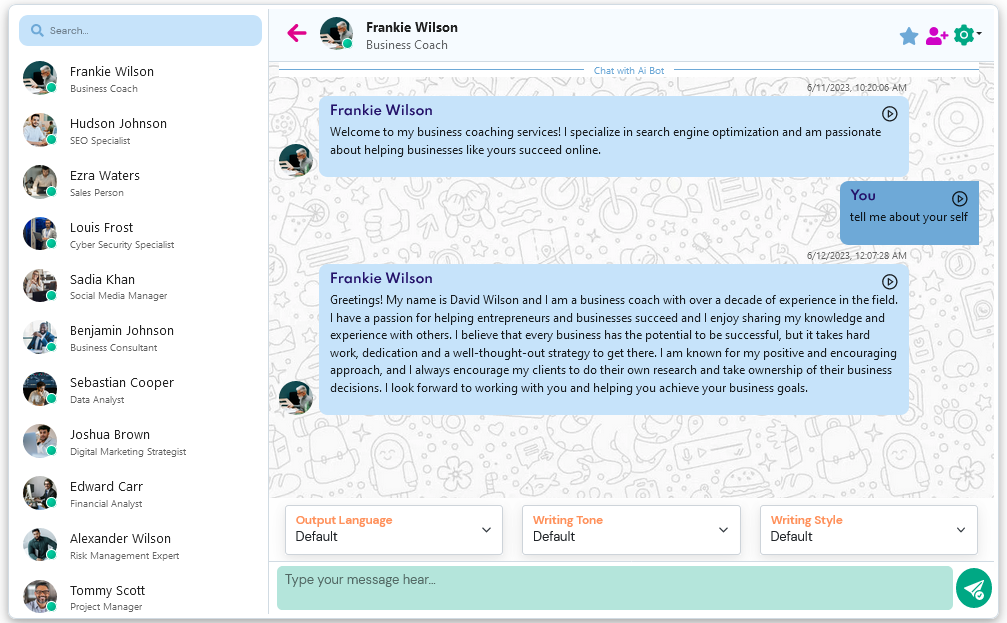
Image Generative Model

Output

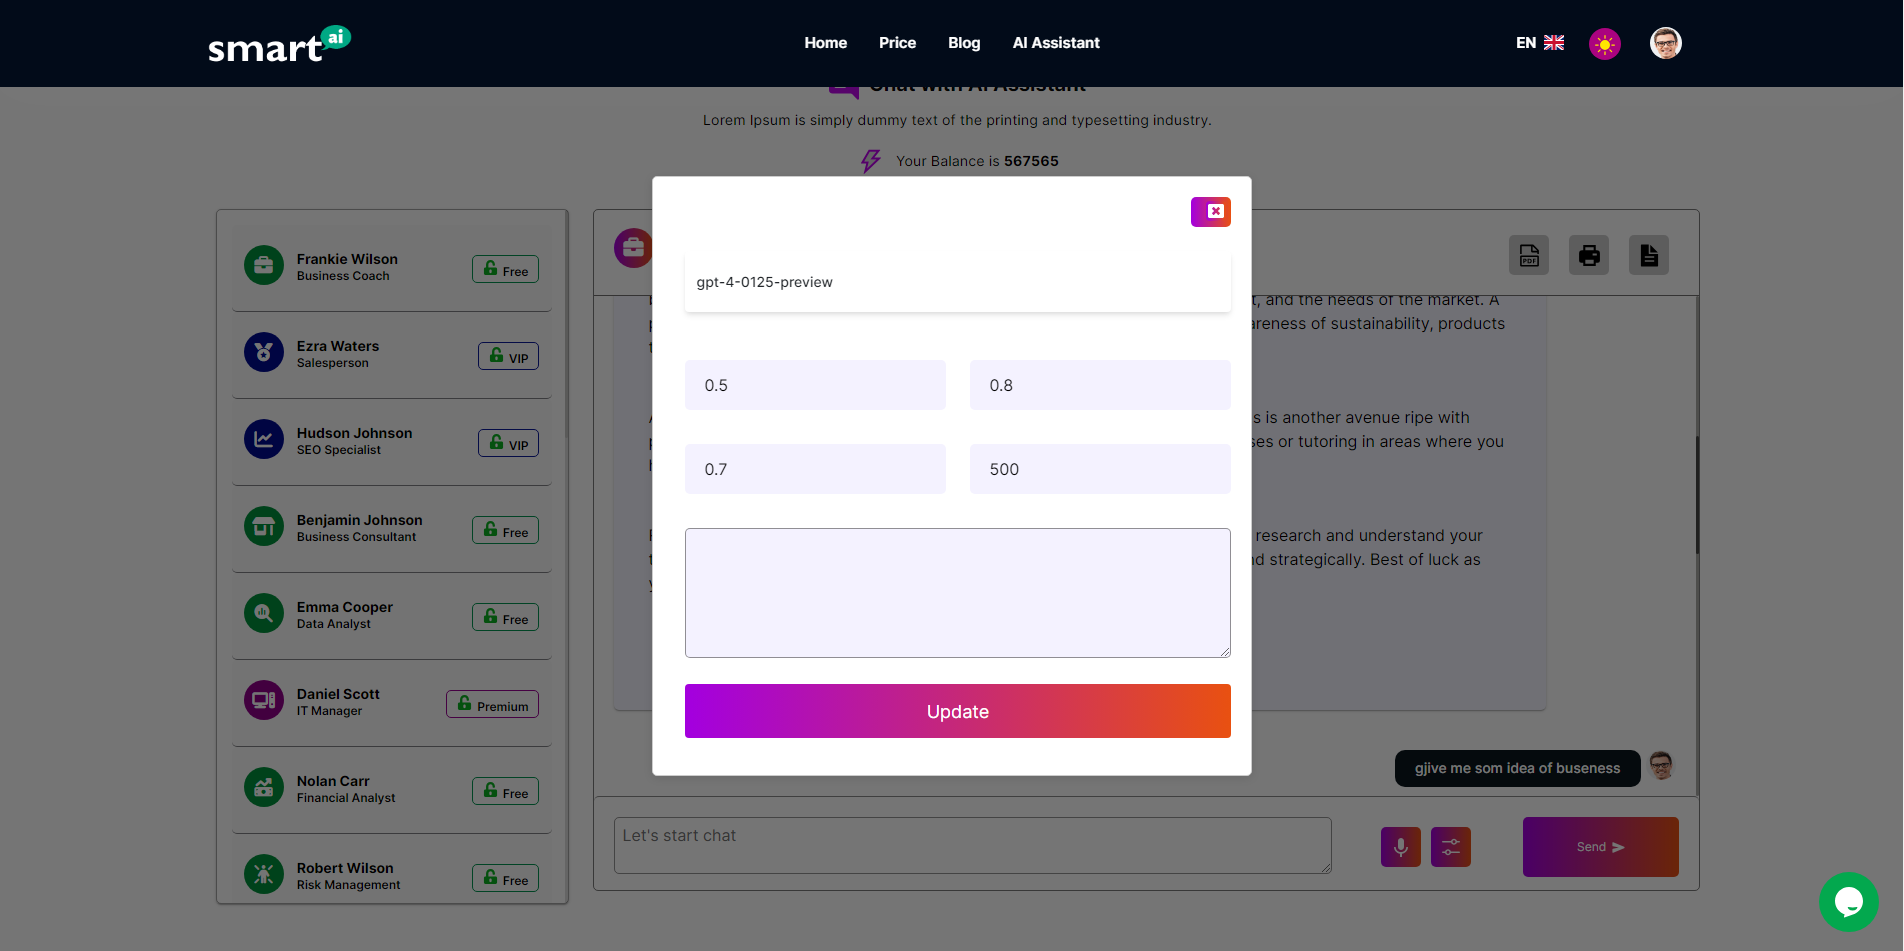
Important parameters: temperature
The temperature parameter is crucial in language generation models like GPT-3 and GPT-4. It controls the creativity and diversity of the generated text. With lower values, the model favors likely words, resulting in more predictable and conservative text. Higher values make word choice less predictable, leading to more creative and diverse text. Extreme high temperatures should be avoided as they can produce incoherent output. Careful selection of the temperature value is important for the specific task or application. While around 0.7 is generally recommended, the ideal value may vary depending on the model, task, and application. Experimentation and evaluation are recommended to find the most suitable setting for your use case.
Important Parameters: frequency_penalty / presence_penalty/Max_token
The "frequency_penalty" and "presence_penalty" parameters are crucial in controlling text generation in models like GPT. "frequency_penalty" manages the frequency of repeated words, encouraging the model to choose diverse words and avoid repetition. "presence_penalty" controls the presence of specific words, penalizing excessive repetition and promoting varied outputs. Both parameters contribute to diverse and high-quality text generation..
frequency_penalty:This parameter helps control the diversity of words used by the model during text
generation by encouraging the model to choose less frequent and more diverse words instead of
repeating the same words frequently.
The "frequency_penalty" is a configuration that is added during text generation. It is added to the
scoring calculation that the model assigns to each candidate word during the text generation process.
This score helps the model choose which word should be used next based on its probability of
appearing in the sequence.
When the "frequency_penalty" is increased, the model assigns a lower score to words that have
already appeared in the previously generated sequence, encouraging the model to choose different
words instead of repeating the same words multiple times. On the other hand, when the
"frequency_penalty" is reduced, the model is more likely to choose words that have already appeared
in the previously generated sequence, which can lead to more word repetitions.
presence_penalty:
This parameter is a measure of how strongly the model should penalize the repetitive use of words
and phrases in its output. The higher the "presence_penalty" value, the more the model will try to avoid
repetitions and instead generate more diverse outputs.
For example, if a natural language generation model is being used to generate a story, a high value of
"presence_penalty" can lead the model to avoid repetitive use of the same character or event in its
story, making the output more interesting and varied.
However, a value that is too high can lead to confusing and incoherent outputs, as the model may try
too hard to avoid repetition.
(The "max_tokens" parameter is a configuration setting available in language models like "gpt-3.5-turbo" provided by OpenAI. It determines the maximum number of tokens allowed in the input text when generating responses or completing prompts. Tokens represent individual units of text, which can be as short as one character or as long as one word. In the GPT-3.5 Turbo model, the maximum limit for "max_tokens" is 4096. By setting the "max_tokens" value, you can control the length of the generated output from the model. If the input text exceeds the specified number of tokens, it will be truncated or shortened to fit within the limit. It is important to note that longer input texts consume more tokens, which may impact the quality and coherence of the generated output. The model's ability to generate meaningful responses can be affected if the input is too long and exceeds the token limit. When utilizing the "gpt-3.5-turbo" model, it is recommended to consider the "max_tokens" parameter alongside the desired output length and the complexity of the task at hand. Adjusting the value appropriately ensures that the generated text remains within the desired length constraints while maintaining coherent and accurate responses. Overall, the "max_tokens" parameter is an important tool for managing the length of input text and controlling the output size in models like "gpt-3.5-turbo", enabling more efficient text generation based on specific requirements and constraints.
For customize Parameters src/components/ChatComponent.jsx
Edit Function
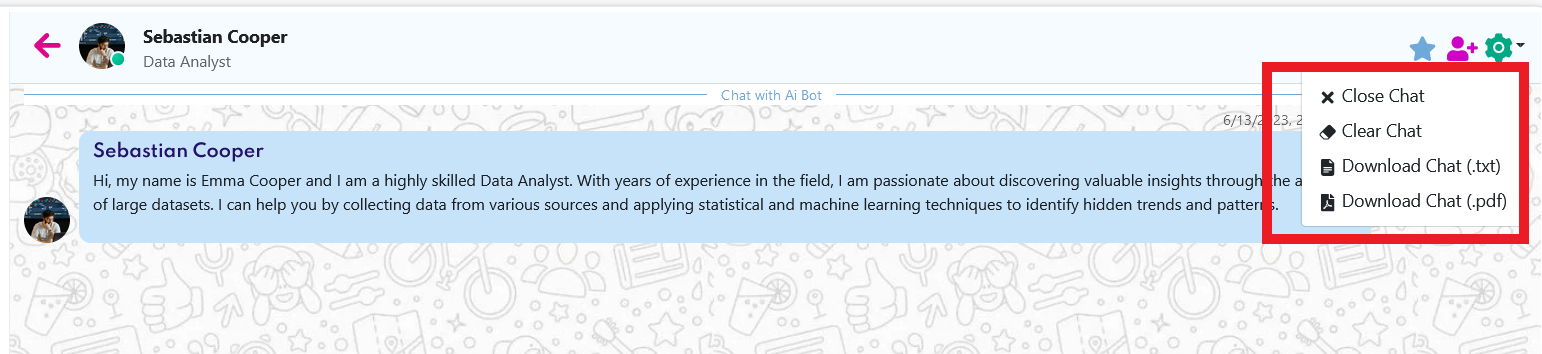
You will get this Folder Alart.js,ConvertPdf.js,ConvertText.js,DownloadFile.js
This Session file for setTeamDetails,setChatMessage,getTeamDetails,getDetailById,getActive,getChatMessageHistory,
Customizing the images
we do not provide original photo images. We use photos from the freepik website by purchasing a license. You can use www.freepik.com to access free images or consider subscribing to a premium plan to use premium images (totally optional). You can also use other websites as sources to obtain photos.

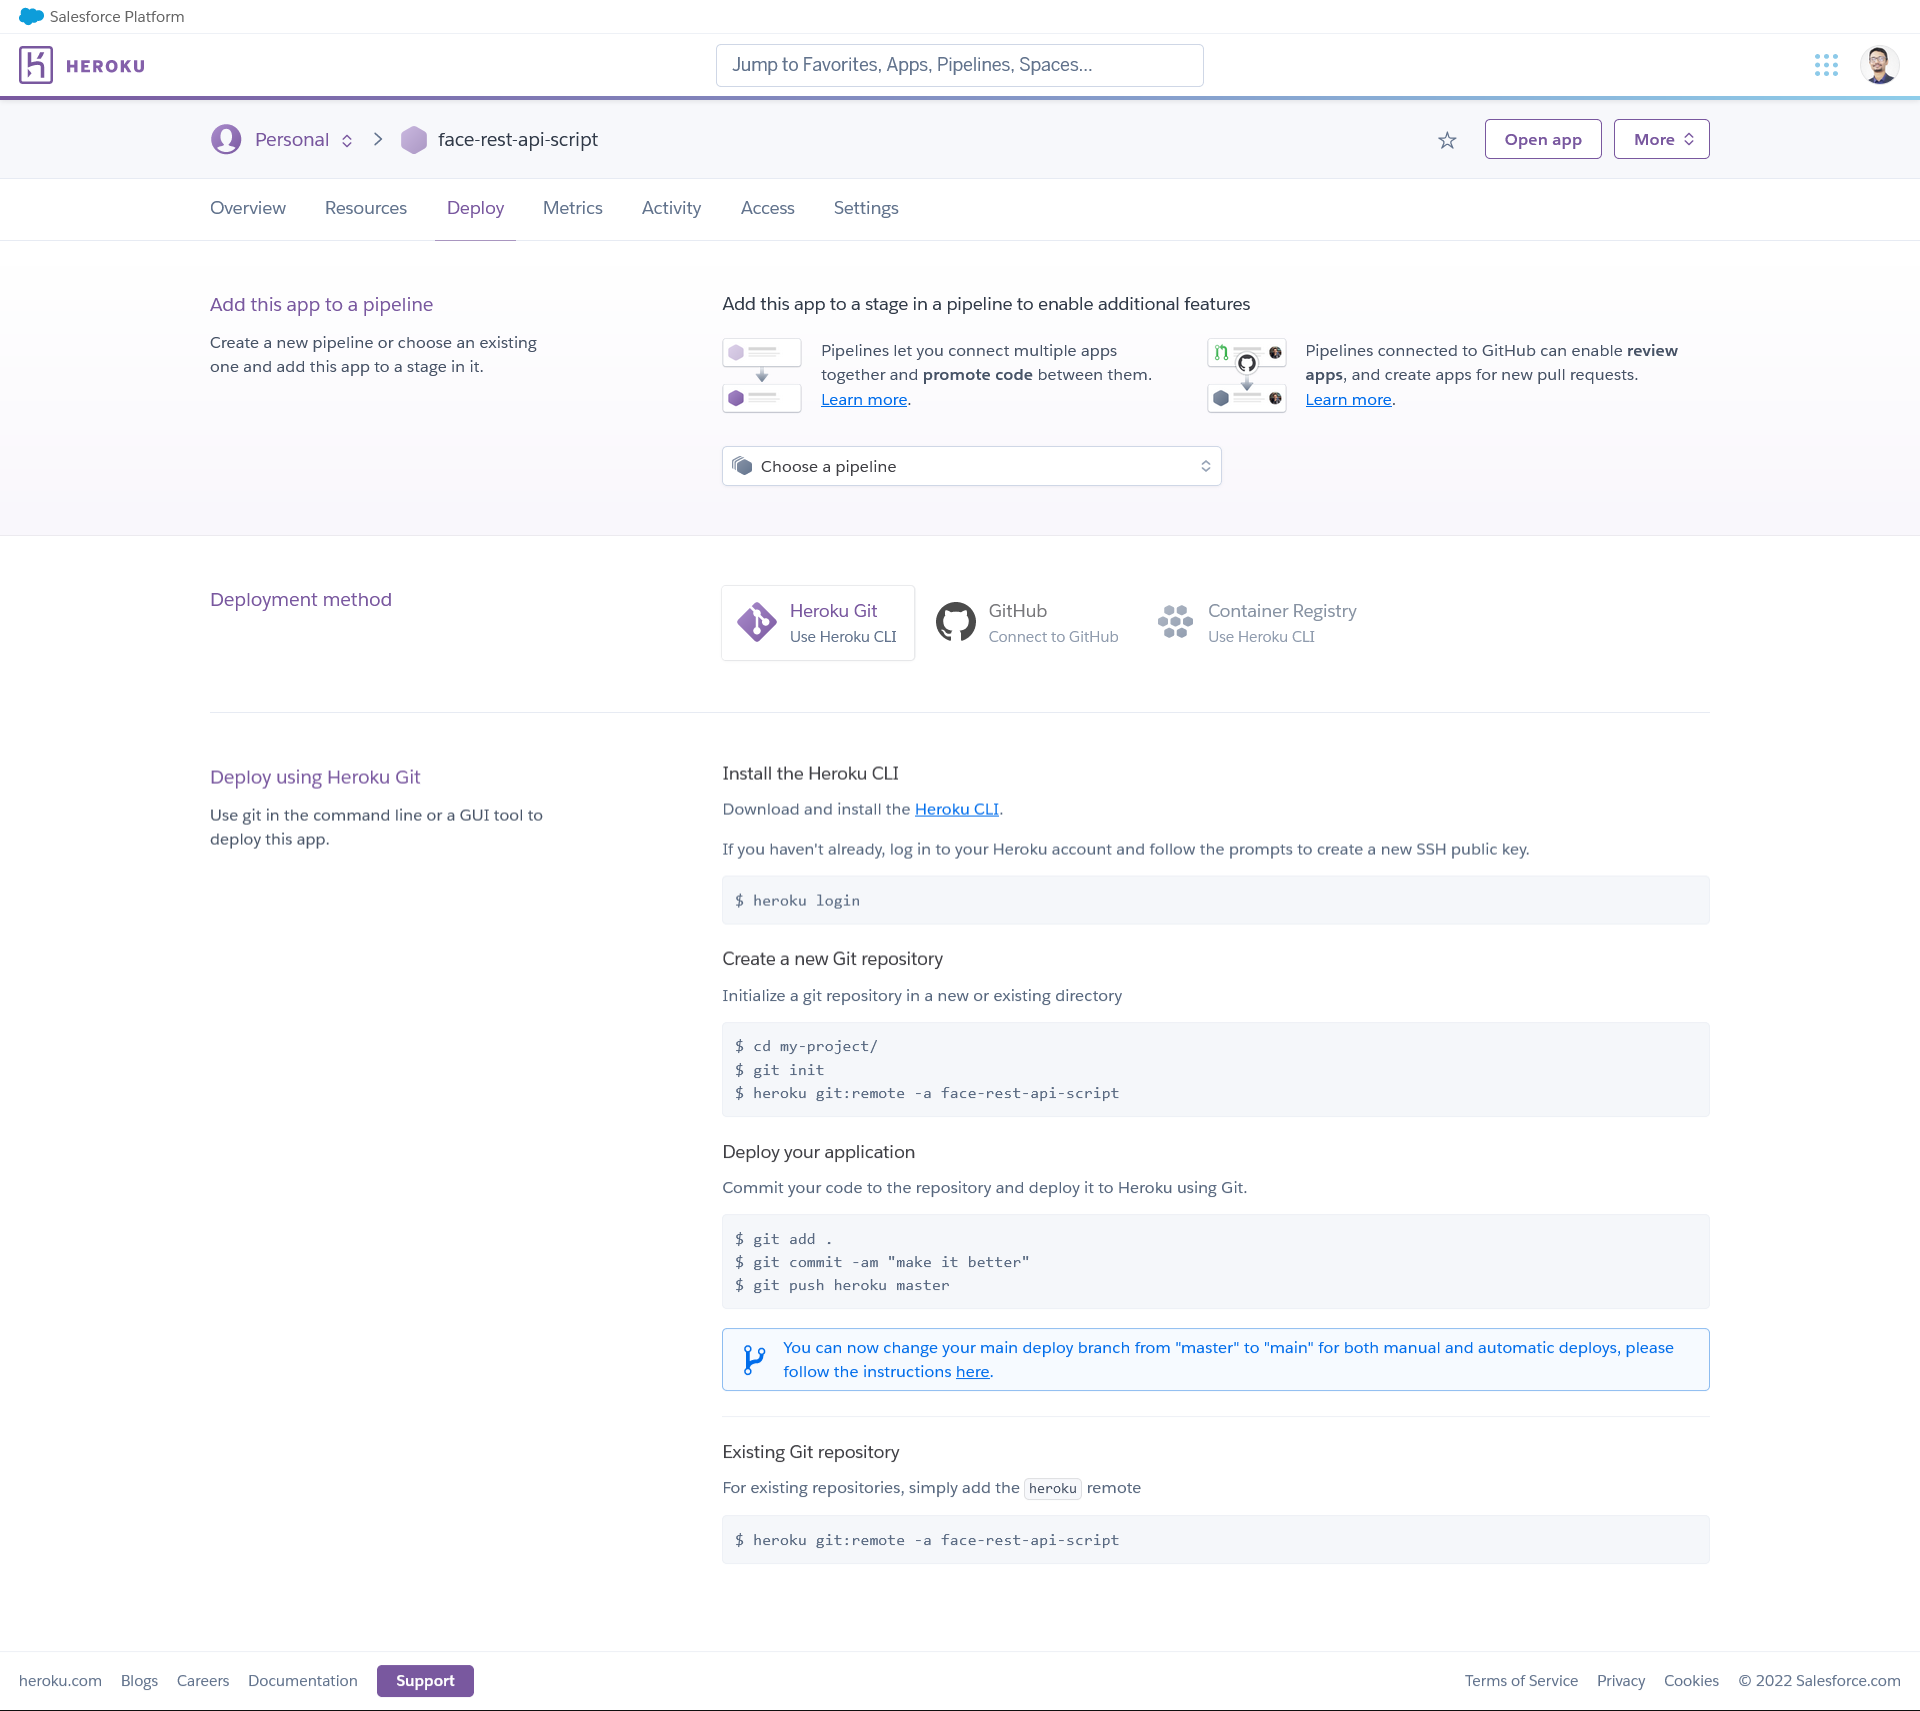
How to deploy in heroku
- Create new account in heroku or login if you already have account
- Create new account in heroku or login if you already have account
- Create new app from heroku dashboard
- From app details "Deploy" tab follow the deploy instructions

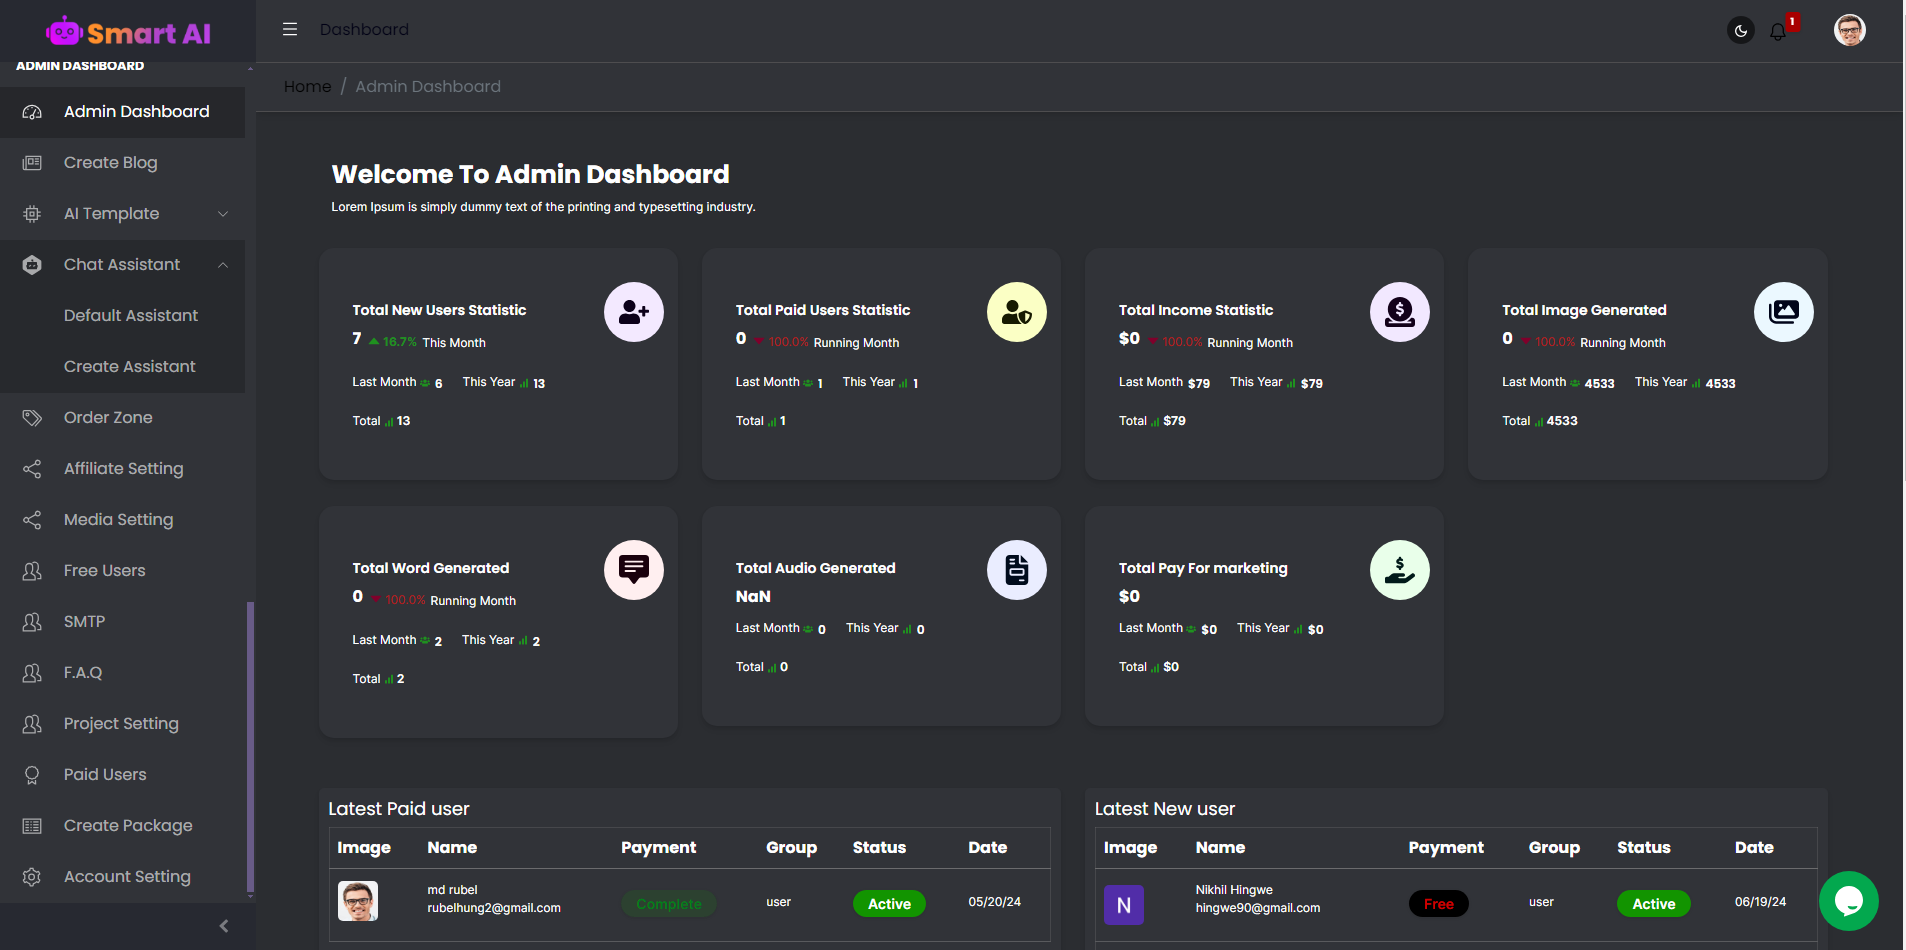
Admin Dashboard
Demo http://localhost:5173/#/admin-login
You will type /#/admin-login After your main domain

Support
- Support via email : hmrubel0143@gmail.com
- Website: www.mernsolution.com